SECourses: FLUX, Tutorials, Guides, Resources, Training, Scripts - Ultimate Image Processing APP Premium by SECourses : Batch Cropping, Zooming In, Resizing, Duplicate Image Removing, Face Extraction, SAM 2, SAM 3.1 and Yolo Segmentation, Masking for Windows, RunPod, Massed Compute part 2
infoAbout This Title
Installers and APP is shared here with instructions : https://www.patreon.com/posts/120352012
APP : https://www.patreon.com/posts/120352012
Video Tutorial : Hopefully coming soon
-
Batch Image Cropping, Zooming Subject, Resizing, Segmenting, Masking, Duplicate Removing APP that utilizes YOLO V26, YOLO Face V12, SAM 2, SAM 3.1 with 1-click installers for Windows, RunPod, SimplePod and Massed Compute (Linux users use this)
28 July 2026 V1.0
We have completey remade the app and read below to understand how it works and full features
Make a fresh install and read the below carefully please
We use latest pre-compiled wheels and Torch 2.13 and CUDA 13
Windows Requirements
Python 3.12.10, FFmpeg, CUDA 13, cuDNN 9.17 or above, Visual Studio Community Edition with all C++ options selected
Don't worry CUDA 13 works with all GPUs - make sure you have updated NVIDIA driver
Follow this requirements tutorial video exactly : https://youtu.be/DrhUHnYfwC0
Follow its updated post with links and screenshots exactly : https://www.patreon.com/SECourses/posts/requirements-written-tutorial-111553210
Installers
All installers automatically downloads all necessary models
I have generated specially compiled BF16 safetensors version of the SAM 3.1 and thus we get almost 100% accuracy with half model VRAM usage
Windows uses Windows_Install_or_Update.bat and then Windows_Start_App.bat
For Runpod and SimplePod please follow : Runpod_SimplePod_Image_Process_Instructions.txt
For Massed Compute or local Linux systems please follow : Massed_Compute_Instructions_READ.txt
How The Ultimate Image Processing Premium by SECourses App Works And What Features It Has
The Ultimate Image Processing Toolkit is a single Gradio app that turns a folder of raw photos into a clean, correctly framed, ready-to-train dataset. It bundles nine tools — SAM 3.1 concept segmentation, YOLO detection, subject-aware cropping, exact-size resizing, tiling, perceptual duplicate removal, low-resolution filtering and batch renaming — and they are designed to feed each other, so the output of one tab is exactly what the next tab expects to read.
One architectural detail matters more than any single feature: the Gradio process never imports torch. Every job runs in a throw-away subprocess that loads the model, does the work and exits, which returns 100% of its VRAM, RAM and CUDA context the moment it finishes. A long session never creeps upwards, and the app sits at zero idle VRAM between runs.
Every screenshot below is from the app running on a real folder of 12 photos (up to 6714 x 5274 px), and every number quoted is the measured result of that run on a single RTX 5090.
Presets — save every setting, everywhere
Before anything else: a preset captures every control in the entire app, across all nine tabs — around 150 of them. The preset you last saved or loaded is restored automatically the next time the app starts, so your working configuration survives a restart.
Selecting a preset in the dropdown changes nothing until you press Load, so a mis-click can never wipe the settings you are in the middle of editing. The built-in Default set lives in code rather than on disk, so it can never be overwritten or deleted — it is always there to fall back to.
Tab 1 — Image Cropper
This is the tab to run first. It finds the subject in every photo of a folder and crops the tightest box that matches each aspect ratio you ask for. The crucial part is the direction it works in: it detects the subject, adds your padding, and then grows the box outwards until the ratio is exact. The subject is never squashed and no part of it is ever cut off.
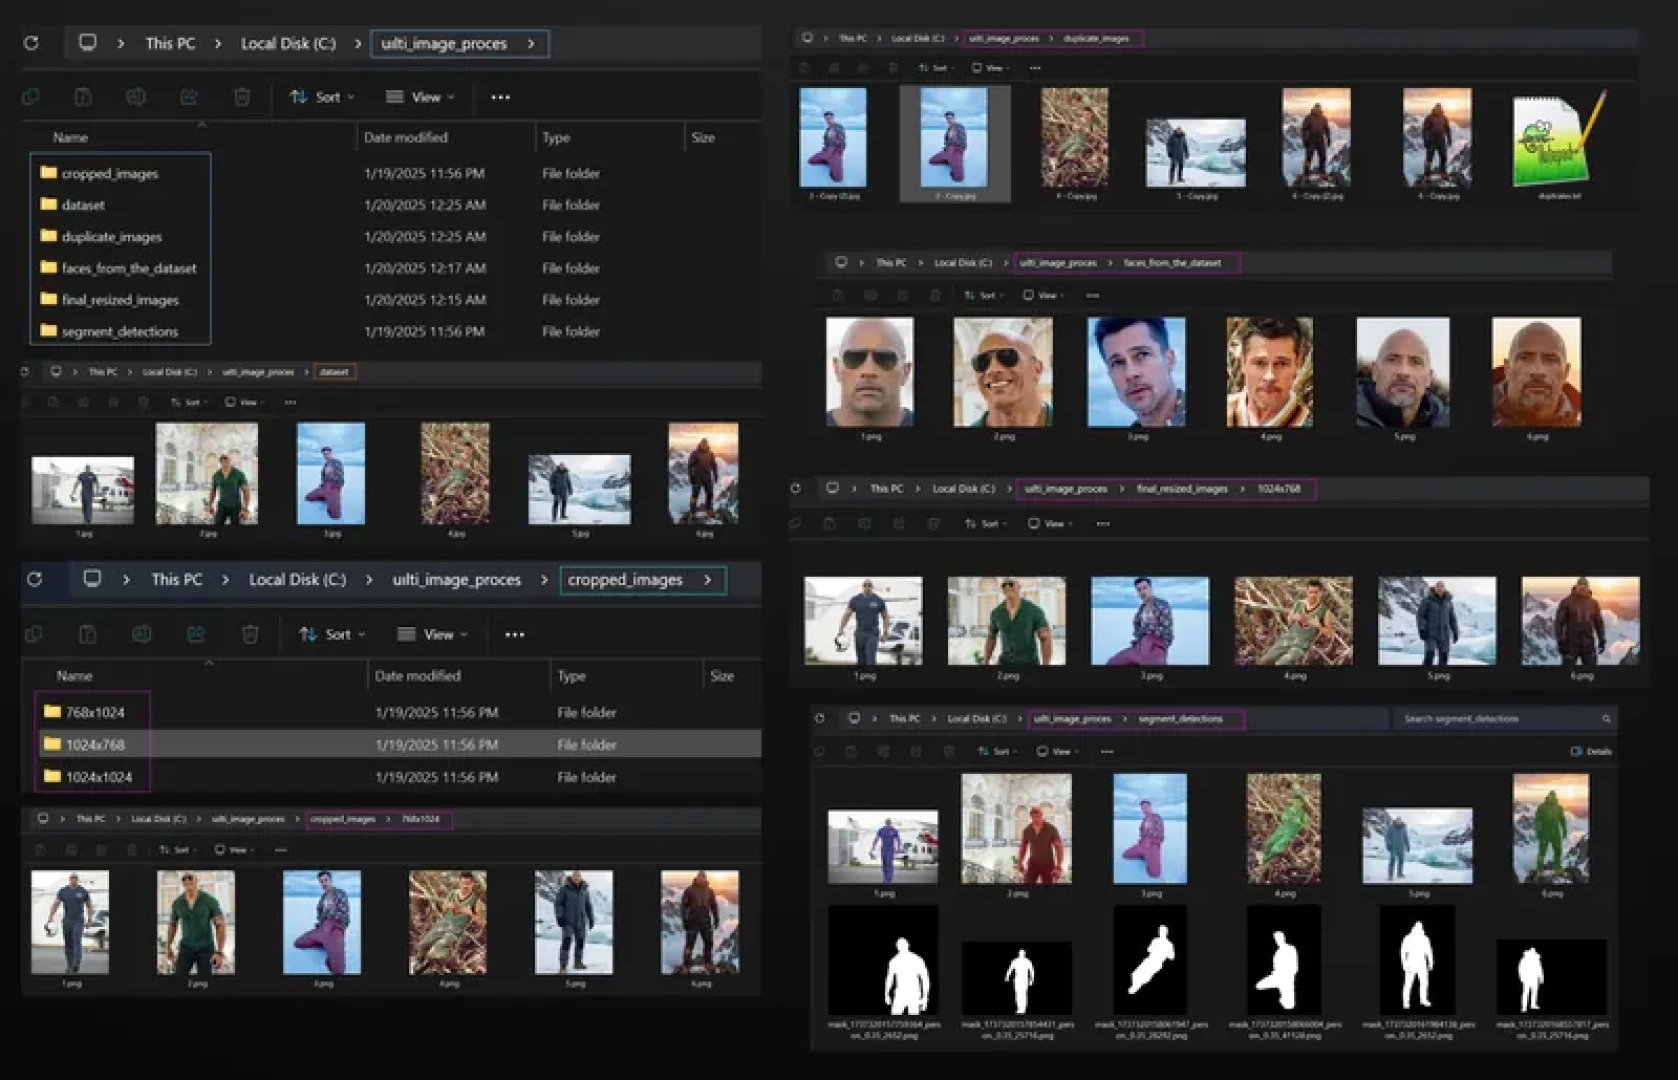
Output goes to one sub-folder per aspect ratio (1024x1024/, 1280x720/, 1080x1350/ …), which is exactly the layout the Image Resizer tab reads back.
Key features:
Live folder scan — before you press start you already know how many images were found, which extensions and the total size on disk.
Three detection engines — SAM 3.1, YOLO, or SAM 2.1 + GroundingDINO, each with only its own thresholds shown.
All instances (union) — spans every match so nobody gets cropped out of a group photo.
Padding in percent or pixels, applied before the ratio so the ratio stays exact. Negative values crop in tighter.
Annotated previews — optionally writes a copy with the detections drawn on it, so you can check a prompt before committing to a big run.
Safe re-runs — with overwrite off, images whose crops already exist are skipped, so an interrupted batch is cheap to resume.
The three detection engines
Pick a backend and the app swaps in only the knobs that backend actually has.
SAM 3.1 (concept prompts) is the default and the one to use. It detects and segments in a single model from open-vocabulary text, returning pixel-accurate masks with no fixed class list. Its knobs are confidence and max instances.
YOLO (class list) is the fastest option and there is no prompt wording to get wrong — 80 COCO classes plus a dedicated face model. Selecting yolov12l-face.pt swaps in the face model automatically. Its knobs are confidence, NMS IoU, inference size and max detections.
SAM 2.1 + GroundingDINO is the older two-stage pipeline, kept so results from earlier versions stay reproducible. GroundingDINO proposes boxes, SAM 2.1 turns them into masks.
How the cropping logic actually works
Detect → pad → grow outwards to the ratio. And the most important detail of all: nothing is ever upscaled. The aspect ratio you type is used as a ratio, not as a target size, so a 6000 px wide photo yields a 6000 px wide 16:9 crop, not a 1280 px one. Tick "Resize crops to the exact target size" if you want the Cropper to scale as well — otherwise crop here and resize in the Image Resizer tab, where you get to choose the resampling filter. That order throws away the least detail.
Watching a real run
Every batch tab shares the same run panel: a live status card with progress, images/sec and ETA, a copyable log naming each file and how many outputs it produced, and a Stop button that really stops the worker and keeps whatever was already written.
Real run: 12 photos at up to 6714 x 5274 px, cropped to three aspect ratios each — 36 output files in 47.7 seconds.
Real results
Below: the annotated detection preview alongside the 1:1, 16:9 and 4:5 crops of the same photos. Every crop is a plain rectangle of original pixels — the app never resamples during cropping. Note the middle row, where "All instances (union)" keeps both people in frame.
Tab 2 — Segmentation
SAM 3.1 masks from plain English, with an interactive single-image tester and a folder batch that share one set of settings.
Always dial your prompt in on one image first — it takes a few seconds and shows you the exact mask, the confidence score and the mask area in pixels. Then the batch section further down the page uses those identical settings; there is no second set of controls to keep in sync.
You get the segmented overlay, the mask itself (white inside, black outside — ready for inpainting, ControlNet or masked training), and a copyable detections table with label, score, bounding box and mask pixel count for every instance.
Negative prompts
You can subtract one concept from another in a single pass. In the example below the prompt is face. and the negative prompt is eye. lips. — the eyes and mouth are carved straight out of the face mask. The negative mask is saved separately so you can reuse or invert it later.
This is how you build skin-only masks, or segment a car while cutting out the person standing in front of it.
Settings and the YOLO backend
Concepts are separated by periods and the vocabulary is open — you are not limited to a class list. Confidence drops weak instances, max instances caps both the result count and how much VRAM the mask upsample needs on a busy scene, and overlay opacity controls only the preview tint (the saved mask is always pure black and white).
On the YOLO backend you multi-select any number of the 80 COCO classes instead of writing a prompt, with a separate exclude list. The YOLO mask source setting decides where masks come from: SAM 2.1 refined turns each box into a pixel-accurate mask (loads a second model, still fast), while filled boxes is instant and plenty for rectangular crops or inpainting blocks.
Batch processing
Point it at a folder and it writes one mask per image, plus optional annotated overlays and negative masks. Leaving the overlay folder empty makes a run noticeably faster, because the masks then never need upsampling to full resolution for display. "Skip images that already have a mask" makes an interrupted run cheap to resume.
Real run: 12 photos, 33 instances found, 28.8 seconds (0.42 img/s).
Real batch output
The prompt was a single word: face. The bottom row is a red-carpet shot with a crowd in the background — SAM 3.1 found 16 separate faces in it and every one is in the mask.
Tab 3 — Extract Faces & Objects
Cuts the detected region out of each photo and saves it as its own image — the fastest way to build a face dataset. Unlike the Image Cropper this does not force an aspect ratio: you get the detection box plus whatever padding you ask for.
Save every detected instance as its own file — a group photo of five people yields five crops (photo_1.png … photo_5.png). Turn it off and you get exactly one crop per photo, chosen by confidence or by largest area.
Padding — faces almost always look better with 15–30% of breathing room. Percent scales with the face, so close-ups and wide shots come out consistent.
Minimum crop size — one slider that drops background faces too small to be useful, instead of you deleting them by hand later.
Not limited to faces: hand. licence plate. dog. all work.
Real output
33 face crops from 12 photos in 9.6 seconds, at 25% padding. The blurry ones in the top row are exactly what the Minimum crop size slider is for.
Tab 4 — Image Resizer
Writes every input image at one or more exact pixel sizes. Each input is written once per resolution into
Run it after the Image Cropper: crop first at native resolution, then resize once with the filter you want. That order loses the least detail.
Real run: 36 files resized in 2.0 seconds — 17.7 images/sec on CPU alone.
It works out what you pointed it at
This used to be the single most common source of confusion, and it is now solved before you press start. Point at an Image Cropper output folder and it reports "Image Cropper layout detected", listing how many files each WxH bucket contributes and naming any resolution that has no matching sub-folder. Point at a plain folder of pictures and it says "Plain folder detected" and does the multiplication for you: 12 images × 3 resolutions = 36 output files.
Framing choices, side by side
Crop to fill keeps the aspect ratio and trims the overflow — no bars, some content lost, and the default. Fit inside keeps every pixel and pads with your chosen background colour. Stretch distorts the image and is almost never what you want.
Separately, Centre the crop on decides where the crop is taken. Image centre is instant and loads no model, but a geometric centre crop can push the subject out of frame. Detected face / subject runs a detector first so the subject stays in frame — slower, since each worker loads its own model, so keep the worker count low in that mode.
Tab 5 — Generate Tiled Images
Slices each photo into an overlapping N×N grid of fixed-size tiles. Because the tiles are cut at native resolution and never upscaled, this is a very good way to turn a handful of very large photos into a high-detail training set.
Tiles per image must be a perfect square — 9 means a 3×3 grid — and the tiles overlap automatically so the whole frame is covered with nothing left out. If an image is smaller than one tile you choose the policy: Skip protects quality, Upscale guarantees output but invents pixels, Shrink the tile keeps the grid but writes smaller tiles for those images only.
Real output
One 3888 x 5648 photo becoming nine overlapping 1024 x 1024 tiles. Across the folder: 108 tiles from 12 photos in 1.2 seconds.
Tab 6 — Find Duplicates
Groups visually identical or near-identical images and moves the extras out of the way, keeping one copy per group. Every comparison uses a true perceptual distance — earlier versions compared hashes as big integers, which is not a similarity measure at all and both missed real duplicates and invented fake ones.
Nothing is deleted. Duplicates are moved to a destination folder keeping their relative structure, and a full report is written next to them, so the whole step is reversible.
You choose which copy survives: highest resolution, largest file, oldest, or first alphabetically.
Choosing an algorithm
The app ships a reference table telling you what each algorithm measures, what it is good at, where it breaks down, and the cutoff to start from — aHash, dHash, pHash, wHash, ColorHash, KAZE local features, and a combined multi-hash mode.
Cutoffs are Hamming distances: how many bits differ out of hash size², so smaller is stricter. Each algorithm gets its own threshold, because a distance of 5 means something completely different for aHash than for pHash. KAZE is the odd one out — it survives rotation, perspective and heavy cropping, but it is quadratic in image count, so keep it for small folders.
There is also a safety cap on image count, because comparison is quadratic and a 100,000-image folder would otherwise run for hours. Anything dropped by the cap is reported explicitly rather than silently ignored.
What actually happened
17 images in, 4 groups found, 4 files moved aside, 0.4 seconds. The test set contained a 50% resize, a byte-identical copy and a heavily re-compressed copy — all four were caught. With the rule set to Highest resolution, the full-size originals stayed and the half-size copies moved; where both members were the same size the tie was broken by name.
Tab 7 — Move Low-Res Files
Quality control for a crop run. Any processed image smaller than your threshold is moved out of the way together with the original it came from, so your two folders stay in sync — you never end up with a source photo whose result has been thrown away.
Set the minimum width and height, then choose whether to reject when either dimension is under the limit (strict) or only when both are. Files are paired by name, and "Same name, any extension" handles the everyday case where the crop is a .png and the original a .jpg. Preview mode is on by default and lists exactly what would move without touching disk. Nothing is deleted — files are moved, so the step is reversible.
Tab 8 — Rename Files
Renames a folder to a clean prefix + number sequence. The rename happens in two passes through temporary names, so a target name already taken by another file in the same folder can never clobber it. Extensions are always preserved.
Set the prefix, the starting number, the zero padding (4 or 5 so files sort correctly everywhere) and the numbering order — by name, by date, or by size. "Only rename image files" leaves captions and JSON sidecars alone. Preview mode is on by default and shows the first 50 planned renames without touching disk.
Tab 9 — Performance & VRAM
Everything on this tab applies to every other tab and is saved with your presets. The shipped defaults are already the fastest configuration that still matches the reference model output — you only need to come here to trade quality for memory, or to try torch.compile.
Run every task in a subprocess (leave it on) — each run starts a fresh Python process, works, then exits, returning 100% of its VRAM and RAM, CUDA context and all.
GPU IDs — comma-separated CUDA indices. With several GPUs the image list is split across them, but each device loads its own copy of the model, so a second GPU only pays for itself on folders of a few hundred images or more. Enter cpu to force CPU processing.
Model precision — the shipped SAM 3.1 checkpoint is stored in bfloat16, so keeping the weights in bfloat16 is bit-identical to the published values. Measured against the float32 path: 0.9992 mask IoU, 46% less VRAM (1.9 GB vs 3.5 GB), 7× faster model loading and 5% faster per image.
Load weights straight into VRAM — builds the model on the GPU and reads the safetensors file directly into VRAM, skipping the ~3.4 GB float32 copy in system RAM. Roughly 2.5× faster model loading.
Chunked mask upsampling — upsamples instance masks a few at a time. On a 24 MP photo with 20 instances this is the difference between a ~1 GB spike and a few tens of MB, and the results are pixel-identical.
Attention kernel, TF32, cuDNN autotuner, channels-last, matmul precision — all exposed, all documented inline.
torch.compile the vision backbone — one-off compile cost of roughly one to three minutes (cached afterwards) in exchange for faster steady-state inference. Worth it for large batches, not for a handful of images; if compilation fails the model silently falls back to eager mode.
SAM 3.1 inference resolution — 1008 is what the model was trained at. Lower is faster but loses small objects; higher costs quadratically more and adds no detail the model was trained to use.
Runtime probe
One click imports torch in a throw-away subprocess and reports what your machine can actually do: Python and platform, torch and CUDA versions, every GPU with its compute capability and VRAM, the status of Triton / FlashAttention / xformers / SageAttention / torchao, whether torch.compile is genuinely usable on this box (CUDA root, host compiler, ninja, cache path), and whether each model backend is ready. Then the subprocess exits and the memory is gone — the Gradio server still holds no CUDA context.
The recommended workflow
Each tab writes what the next one expects to read:
1. Find Duplicates — clean first, so you never spend GPU time on near-identical shots.
2. Image Cropper — frame the subject, one sub-folder per ratio, at native resolution.
3. Move Low-Res Files — quality control, results and originals moved together.
4. Image Resizer — point it at the Cropper's output folder for exact pixel sizes.
5. Rename Files — a clean, correctly sorting sequence.
Side branches to run whenever you need them: Segmentation for masks, Extract Faces for a face dataset, Generate Tiled Images for more data out of very large photos, and Performance & VRAM set once for everything.
The one rule that matters most: crop before you resize. Cropping keeps the original pixels, so resizing afterwards starts from the largest possible image and only has to downscale once. The other way round throws away detail you can never get back, and can force an upscale.
What lands where on disk
The Image Cropper's
Quick reference
Every tab, the one setting that matters most, and the mistake to avoid — plus four things worth remembering: presets save everything, the folder scan card tells you what will happen before you press start, subprocess mode keeps idle VRAM at zero, and every destructive-looking step (duplicates, low-res, renames) is either a move or has a preview mode.
Installers and APP is shared here with instructions : https://www.patreon.com/posts/120352012
APP : https://www.patreon.com/posts/120352012
Video Tutorial : Hopefully coming soon
-
Batch Image Cropping, Zooming Subject, Resizing, Segmenting, Masking, Duplicate Removing APP that utilizes YOLO V26, YOLO Face V12, SAM 2, SAM 3.1 with 1-click installers for Windows, RunPod, SimplePod and Massed Compute (Linux users use this)
28 July 2026 V1.0
We have completey remade the app and read below to understand how it works and full features
Make a fresh install and read the below carefully please
We use latest pre-compiled wheels and Torch 2.13 and CUDA 13
Windows Requirements
Python 3.12.10, FFmpeg, CUDA 13, cuDNN 9.17 or above, Visual Studio Community Edition with all C++ options selected
Don't worry CUDA 13 works with all GPUs - make sure you have updated NVIDIA driver
Follow this requirements tutorial video exactly : https://youtu.be/DrhUHnYfwC0
Follow its updated post with links and screenshots exactly : https://www.patreon.com/SECourses/posts/requirements-written-tutorial-111553210
Installers
All installers automatically downloads all necessary models
I have generated specially compiled BF16 safetensors version of the SAM 3.1 and thus we get almost 100% accuracy with half model VRAM usage
Windows uses Windows_Install_or_Update.bat and then Windows_Start_App.bat
For Runpod and SimplePod please follow : Runpod_SimplePod_Image_Process_Instructions.txt
For Massed Compute or local Linux systems please follow : Massed_Compute_Instructions_READ.txt
How The Ultimate Image Processing Premium by SECourses App Works And What Features It Has
The Ultimate Image Processing Toolkit is a single Gradio app that turns a folder of raw photos into a clean, correctly framed, ready-to-train dataset. It bundles nine tools — SAM 3.1 concept segmentation, YOLO detection, subject-aware cropping, exact-size resizing, tiling, perceptual duplicate removal, low-resolution filtering and batch renaming — and they are designed to feed each other, so the output of one tab is exactly what the next tab expects to read.
One architectural detail matters more than any single feature: the Gradio process never imports torch. Every job runs in a throw-away subprocess that loads the model, does the work and exits, which returns 100% of its VRAM, RAM and CUDA context the moment it finishes. A long session never creeps upwards, and the app sits at zero idle VRAM between runs.
Every screenshot below is from the app running on a real folder of 12 photos (up to 6714 x 5274 px), and every number quoted is the measured result of that run on a single RTX 5090.
Presets — save every setting, everywhere
Before anything else: a preset captures every control in the entire app, across all nine tabs — around 150 of them. The preset you last saved or loaded is restored automatically the next time the app starts, so your working configuration survives a restart.
Selecting a preset in the dropdown changes nothing until you press Load, so a mis-click can never wipe the settings you are in the middle of editing. The built-in Default set lives in code rather than on disk, so it can never be overwritten or deleted — it is always there to fall back to.
Tab 1 — Image Cropper
This is the tab to run first. It finds the subject in every photo of a folder and crops the tightest box that matches each aspect ratio you ask for. The crucial part is the direction it works in: it detects the subject, adds your padding, and then grows the box outwards until the ratio is exact. The subject is never squashed and no part of it is ever cut off.
Output goes to one sub-folder per aspect ratio (1024x1024/, 1280x720/, 1080x1350/ …), which is exactly the layout the Image Resizer tab reads back.
Key features:
Live folder scan — before you press start you already know how many images were found, which extensions and the total size on disk.
Three detection engines — SAM 3.1, YOLO, or SAM 2.1 + GroundingDINO, each with only its own thresholds shown.
All instances (union) — spans every match so nobody gets cropped out of a group photo.
Padding in percent or pixels, applied before the ratio so the ratio stays exact. Negative values crop in tighter.
Annotated previews — optionally writes a copy with the detections drawn on it, so you can check a prompt before committing to a big run.
Safe re-runs — with overwrite off, images whose crops already exist are skipped, so an interrupted batch is cheap to resume.
The three detection engines
Pick a backend and the app swaps in only the knobs that backend actually has.
SAM 3.1 (concept prompts) is the default and the one to use. It detects and segments in a single model from open-vocabulary text, returning pixel-accurate masks with no fixed class list. Its knobs are confidence and max instances.
YOLO (class list) is the fastest option and there is no prompt wording to get wrong — 80 COCO classes plus a dedicated face model. Selecting yolov12l-face.pt swaps in the face model automatically. Its knobs are confidence, NMS IoU, inference size and max detections.
SAM 2.1 + GroundingDINO is the older two-stage pipeline, kept so results from earlier versions stay reproducible. GroundingDINO proposes boxes, SAM 2.1 turns them into masks.
How the cropping logic actually works
Detect → pad → grow outwards to the ratio. And the most important detail of all: nothing is ever upscaled. The aspect ratio you type is used as a ratio, not as a target size, so a 6000 px wide photo yields a 6000 px wide 16:9 crop, not a 1280 px one. Tick "Resize crops to the exact target size" if you want the Cropper to scale as well — otherwise crop here and resize in the Image Resizer tab, where you get to choose the resampling filter. That order throws away the least detail.
Watching a real run
Every batch tab shares the same run panel: a live status card with progress, images/sec and ETA, a copyable log naming each file and how many outputs it produced, and a Stop button that really stops the worker and keeps whatever was already written.
Real run: 12 photos at up to 6714 x 5274 px, cropped to three aspect ratios each — 36 output files in 47.7 seconds.
Real results
Below: the annotated detection preview alongside the 1:1, 16:9 and 4:5 crops of the same photos. Every crop is a plain rectangle of original pixels — the app never resamples during cropping. Note the middle row, where "All instances (union)" keeps both people in frame.
Tab 2 — Segmentation
SAM 3.1 masks from plain English, with an interactive single-image tester and a folder batch that share one set of settings.
Always dial your prompt in on one image first — it takes a few seconds and shows you the exact mask, the confidence score and the mask area in pixels. Then the batch section further down the page uses those identical settings; there is no second set of controls to keep in sync.
You get the segmented overlay, the mask itself (white inside, black outside — ready for inpainting, ControlNet or masked training), and a copyable detections table with label, score, bounding box and mask pixel count for every instance.
Negative prompts
You can subtract one concept from another in a single pass. In the example below the prompt is face. and the negative prompt is eye. lips. — the eyes and mouth are carved straight out of the face mask. The negative mask is saved separately so you can reuse or invert it later.
This is how you build skin-only masks, or segment a car while cutting out the person standing in front of it.
Settings and the YOLO backend
Concepts are separated by periods and the vocabulary is open — you are not limited to a class list. Confidence drops weak instances, max instances caps both the result count and how much VRAM the mask upsample needs on a busy scene, and overlay opacity controls only the preview tint (the saved mask is always pure black and white).
On the YOLO backend you multi-select any number of the 80 COCO classes instead of writing a prompt, with a separate exclude list. The YOLO mask source setting decides where masks come from: SAM 2.1 refined turns each box into a pixel-accurate mask (loads a second model, still fast), while filled boxes is instant and plenty for rectangular crops or inpainting blocks.
Batch processing
Point it at a folder and it writes one mask per image, plus optional annotated overlays and negative masks. Leaving the overlay folder empty makes a run noticeably faster, because the masks then never need upsampling to full resolution for display. "Skip images that already have a mask" makes an interrupted run cheap to resume.
Real run: 12 photos, 33 instances found, 28.8 seconds (0.42 img/s).
Real batch output
The prompt was a single word: face. The bottom row is a red-carpet shot with a crowd in the background — SAM 3.1 found 16 separate faces in it and every one is in the mask.
Tab 3 — Extract Faces & Objects
Cuts the detected region out of each photo and saves it as its own image — the fastest way to build a face dataset. Unlike the Image Cropper this does not force an aspect ratio: you get the detection box plus whatever padding you ask for.
Save every detected instance as its own file — a group photo of five people yields five crops (photo_1.png … photo_5.png). Turn it off and you get exactly one crop per photo, chosen by confidence or by largest area.
Padding — faces almost always look better with 15–30% of breathing room. Percent scales with the face, so close-ups and wide shots come out consistent.
Minimum crop size — one slider that drops background faces too small to be useful, instead of you deleting them by hand later.
Not limited to faces: hand. licence plate. dog. all work.
Real output
33 face crops from 12 photos in 9.6 seconds, at 25% padding. The blurry ones in the top row are exactly what the Minimum crop size slider is for.
Tab 4 — Image Resizer
Writes every input image at one or more exact pixel sizes. Each input is written once per resolution into
Run it after the Image Cropper: crop first at native resolution, then resize once with the filter you want. That order loses the least detail.
Real run: 36 files resized in 2.0 seconds — 17.7 images/sec on CPU alone.
It works out what you pointed it at
This used to be the single most common source of confusion, and it is now solved before you press start. Point at an Image Cropper output folder and it reports "Image Cropper layout detected", listing how many files each WxH bucket contributes and naming any resolution that has no matching sub-folder. Point at a plain folder of pictures and it says "Plain folder detected" and does the multiplication for you: 12 images × 3 resolutions = 36 output files.
Framing choices, side by side
Crop to fill keeps the aspect ratio and trims the overflow — no bars, some content lost, and the default. Fit inside keeps every pixel and pads with your chosen background colour. Stretch distorts the image and is almost never what you want.
Separately, Centre the crop on decides where the crop is taken. Image centre is instant and loads no model, but a geometric centre crop can push the subject out of frame. Detected face / subject runs a detector first so the subject stays in frame — slower, since each worker loads its own model, so keep the worker count low in that mode.
Tab 5 — Generate Tiled Images
Slices each photo into an overlapping N×N grid of fixed-size tiles. Because the tiles are cut at native resolution and never upscaled, this is a very good way to turn a handful of very large photos into a high-detail training set.
Tiles per image must be a perfect square — 9 means a 3×3 grid — and the tiles overlap automatically so the whole frame is covered with nothing left out. If an image is smaller than one tile you choose the policy: Skip protects quality, Upscale guarantees output but invents pixels, Shrink the tile keeps the grid but writes smaller tiles for those images only.
Real output
One 3888 x 5648 photo becoming nine overlapping 1024 x 1024 tiles. Across the folder: 108 tiles from 12 photos in 1.2 seconds.
Tab 6 — Find Duplicates
Groups visually identical or near-identical images and moves the extras out of the way, keeping one copy per group. Every comparison uses a true perceptual distance — earlier versions compared hashes as big integers, which is not a similarity measure at all and both missed real duplicates and invented fake ones.
Nothing is deleted. Duplicates are moved to a destination folder keeping their relative structure, and a full report is written next to them, so the whole step is reversible.
You choose which copy survives: highest resolution, largest file, oldest, or first alphabetically.
Choosing an algorithm
The app ships a reference table telling you what each algorithm measures, what it is good at, where it breaks down, and the cutoff to start from — aHash, dHash, pHash, wHash, ColorHash, KAZE local features, and a combined multi-hash mode.
Cutoffs are Hamming distances: how many bits differ out of hash size², so smaller is stricter. Each algorithm gets its own threshold, because a distance of 5 means something completely different for aHash than for pHash. KAZE is the odd one out — it survives rotation, perspective and heavy cropping, but it is quadratic in image count, so keep it for small folders.
There is also a safety cap on image count, because comparison is quadratic and a 100,000-image folder would otherwise run for hours. Anything dropped by the cap is reported explicitly rather than silently ignored.
What actually happened
17 images in, 4 groups found, 4 files moved aside, 0.4 seconds. The test set contained a 50% resize, a byte-identical copy and a heavily re-compressed copy — all four were caught. With the rule set to Highest resolution, the full-size originals stayed and the half-size copies moved; where both members were the same size the tie was broken by name.
Tab 7 — Move Low-Res Files
Quality control for a crop run. Any processed image smaller than your threshold is moved out of the way together with the original it came from, so your two folders stay in sync — you never end up with a source photo whose result has been thrown away.
Set the minimum width and height, then choose whether to reject when either dimension is under the limit (strict) or only when both are. Files are paired by name, and "Same name, any extension" handles the everyday case where the crop is a .png and the original a .jpg. Preview mode is on by default and lists exactly what would move without touching disk. Nothing is deleted — files are moved, so the step is reversible.
Tab 8 — Rename Files
Renames a folder to a clean prefix + number sequence. The rename happens in two passes through temporary names, so a target name already taken by another file in the same folder can never clobber it. Extensions are always preserved.
Set the prefix, the starting number, the zero padding (4 or 5 so files sort correctly everywhere) and the numbering order — by name, by date, or by size. "Only rename image files" leaves captions and JSON sidecars alone. Preview mode is on by default and shows the first 50 planned renames without touching disk.
Tab 9 — Performance & VRAM
Everything on this tab applies to every other tab and is saved with your presets. The shipped defaults are already the fastest configuration that still matches the reference model output — you only need to come here to trade quality for memory, or to try torch.compile.
Run every task in a subprocess (leave it on) — each run starts a fresh Python process, works, then exits, returning 100% of its VRAM and RAM, CUDA context and all.
GPU IDs — comma-separated CUDA indices. With several GPUs the image list is split across them, but each device loads its own copy of the model, so a second GPU only pays for itself on folders of a few hundred images or more. Enter cpu to force CPU processing.
Model precision — the shipped SAM 3.1 checkpoint is stored in bfloat16, so keeping the weights in bfloat16 is bit-identical to the published values. Measured against the float32 path: 0.9992 mask IoU, 46% less VRAM (1.9 GB vs 3.5 GB), 7× faster model loading and 5% faster per image.
Load weights straight into VRAM — builds the model on the GPU and reads the safetensors file directly into VRAM, skipping the ~3.4 GB float32 copy in system RAM. Roughly 2.5× faster model loading.
Chunked mask upsampling — upsamples instance masks a few at a time. On a 24 MP photo with 20 instances this is the difference between a ~1 GB spike and a few tens of MB, and the results are pixel-identical.
Attention kernel, TF32, cuDNN autotuner, channels-last, matmul precision — all exposed, all documented inline.
torch.compile the vision backbone — one-off compile cost of roughly one to three minutes (cached afterwards) in exchange for faster steady-state inference. Worth it for large batches, not for a handful of images; if compilation fails the model silently falls back to eager mode.
SAM 3.1 inference resolution — 1008 is what the model was trained at. Lower is faster but loses small objects; higher costs quadratically more and adds no detail the model was trained to use.
Runtime probe
One click imports torch in a throw-away subprocess and reports what your machine can actually do: Python and platform, torch and CUDA versions, every GPU with its compute capability and VRAM, the status of Triton / FlashAttention / xformers / SageAttention / torchao, whether torch.compile is genuinely usable on this box (CUDA root, host compiler, ninja, cache path), and whether each model backend is ready. Then the subprocess exits and the memory is gone — the Gradio server still holds no CUDA context.
The recommended workflow
Each tab writes what the next one expects to read:
1. Find Duplicates — clean first, so you never spend GPU time on near-identical shots.
2. Image Cropper — frame the subject, one sub-folder per ratio, at native resolution.
3. Move Low-Res Files — quality control, results and originals moved together.
4. Image Resizer — point it at the Cropper's output folder for exact pixel sizes.
5. Rename Files — a clean, correctly sorting sequence.
Side branches to run whenever you need them: Segmentation for masks, Extract Faces for a face dataset, Generate Tiled Images for more data out of very large photos, and Performance & VRAM set once for everything.
The one rule that matters most: crop before you resize. Cropping keeps the original pixels, so resizing afterwards starts from the largest possible image and only has to downscale once. The other way round throws away detail you can never get back, and can force an upscale.
What lands where on disk
The Image Cropper's
Quick reference
Every tab, the one setting that matters most, and the mistake to avoid — plus four things worth remembering: presets save everything, the folder scan card tells you what will happen before you press start, subprocess mode keeps idle VRAM at zero, and every destructive-looking step (duplicates, low-res, renames) is either a move or has a preview mode.

Comments (0)